Thursday, February 18, 2021

My-SQL: Deleting all duplicate rows but keeping one row for table

MySQL Query :

DELETE FROM `Tablename` WHERE id NOT IN ( SELECT MIN(id) FROM (SELECT * FROM Tablename ) as t1 GROUP BY field1, field2, field3, field4, field5 ) 

Here fields are column on which you want to group the duplicate rows.

Tuesday, August 4, 2020

Linux / ubuntu Server monitoring script and commands

Check server  Memory, CPU load, Storage with date time.

#! /bin/bash
printf "Memory\t\tOS_Disk\t\tHome_Disk\tCPU\t\tTime\n"
end=$((SECONDS+3600))
while [ $SECONDS -lt $end ]; do
MEMORY=$(free -m | awk 'NR==2{printf "%.2f%%\t\t", $3*100/$2 }')
DISK=$(df -h | awk '$NF=="/"{printf "%s\t\t", $5}')
DISKHOME=$(df -h | awk '$NF=="/home"{printf "%s\t\t", $5}')
CPU=$(top -bn1 | grep load | awk '{printf "%.2f%%\t\t\n", $(NF-2)}')
DATELOG=$(date "+%Y-%m-%d %T")
echo "$MEMORY$DISK$DISKHOME$CPU$DATELOG"
sleep 20
done

save this file as stats.sh

run file 

#./stats.sh

Tools
Basic listed below 
strace – discover system calls and signals to a process.
tcpdump – raw network traffic monitoring.
netstat – network connections monitoring.
htop – real time process monitoring.
iftop – real time network bandwidth monitoring.
lsof – view which files are opened by which process.

Sysdig - A Powerful System Monitoring and Troubleshooting Tool for Linux

Command for sysdig

$sudo sysdig
$csysdig
$sysdig -cl
$Sysdig -r trace.scap
$sysdig -c ps
$sysdig -c ps
$sysdig -c list_login_shells
$sysdig -c spy_users

For more detail click here

Basic Command for  Server monitoring

$last
$last reboot | shutdown
$htop
$top
$jobs
$who -b
$ps -aux| grep apache|wc -l  (check apache threads)


Thursday, October 10, 2019

Setup Filesystem Quotas on Linux / Ubuntu Server

Installing the Quota Tools

sudo apt update
sudo apt install quota

Check Quota Version :

quota --version

Installing the Quota Kernel Module
First need  to check, we will use find to search for the quota_v1 and quota_v2 modules in the /lib/modules/... directory:

find /lib/modules/`uname -r` -type f -name '*quota_v*.ko*'

Output : 
/lib/modules/4.15.0-45-generic/kernel/fs/quota/quota_v1.ko
/lib/modules/4.15.0-45-generic/kernel/fs/quota/quota_v2.ko

If you get no output from the above command, install

sudo apt install linux-image-extra-virtual
OR 
Resolve this install kernel dependencies, like this:

apt-get -y install linux-image-generic
apt-get -y install linux-headers-generic
apt-get -y install linux-image-extra-`uname -r`

After that we need to add the quota modules to start with boot:

echo quota_v1 >> /etc/modules
echo quota_v2 >> /etc/modules

Updating Filesystem Mount Options

sudo nano /etc/fstab
LABEL=/home    /home   ext2   defaults,usrquota,grpquota  0 0
Remount the filesystem to make the new options take effect:

sudo mount -o remount /home

Enabling Quotas
sudo quotacheck -ugm /home

Now we’re ready to turn on the quota system:

sudo quotaon -v /home

Configuring Quotas for a User

Using edquota to Set a User Quota

sudo edquota -u  jagdeep

# edquota ramesh

Disk quotas for user jagdeep (uid 50001):
  Filesystem           blocks       soft       hard     inodes     soft     hard
  /dev/sda3           1419352          0          0       1686        0        0
Let’s update our sammy user to have a block quota with a 100MB soft limit, and a 110MB hard limit:

# edquota ramesh

Disk quotas for user jagdeep (uid 50001):
  Filesystem         blocks       soft       hard     inodes     soft     hard
  /dev/sda3        1419352       100M          110M   1686    0        0
Save and close the file

sudo quota -vs jagdeep

Using setquota to Set a User Quota
sudo setquota -u sammy 200M 220M 0 0 /home

Generating Quota Reports

sudo repquota -s /home

# repquota /home
*** Report for user quotas on device /dev/sda3
Block grace time: 7days; Inode grace time: 7days
                        Block limits                File limits
User            used    soft    hard  grace    used  soft  hard  grace
----------------------------------------------------------------------
root      --  566488       0       0           5401     0     0
nobody    --    1448       0       0             30     0     0
jagdeep    -- 1419352       0       0           1686     0     0
john      --   26604       0       0            172     0     0

Configuring a Grace Period for Overages

sudo setquota -t 864000 864000 /home


Output
Block grace time: 10days; Inode grace time: 10days
. . .

Disable quota for a Linux user or group on the shell
Example for disabling the quota for the user "testuser":
setquota -u testuser 0 0 0 0 -a /home
Example for disabling quota for the group "testgroup":
setquota -g testgroup 0 0 0 0 -a /home

Thursday, December 6, 2018

Installing PHP and Configuring Nginx to Use the PHP Processor

Nginx does not contain native PHP processing like some other web servers, install php-fpm, which mean for "fastCGI process manager". Nginx to pass PHP requests to this software for processing.

Install the php-fpm module along with an additional helper package for mysql database server php-mysql, which will allow PHP to communicate with your database backend. Do this by typing:
sudo apt install php-fpm, php-mysql

Add the following content, which was taken and slightly modified from the default server block configuration file, to your new server block configuration file: /etc/nginx/sites-available/default


server {
        listen 80;
        root /var/www/html;
        index index.php index.html index.htm index.nginx-debian.html;
        server_name test.com;

        location / {
                try_files $uri $uri/ =404;
        }

        location ~ \.php$ {
                include snippets/fastcgi-php.conf;
                fastcgi_pass unix:/var/run/php/php7.2-fpm.sock;
        }

        location ~ /\.ht {
                deny all;
        }
}
Test your new configuration file for syntax errors by typing:
sudo nginx -t

Reload Nginx to make the necessary changes:
sudo systemctl reload nginx


Creating a PHP File to Test Configuration
To do this, use your text editor to create a test PHP file called info.php in your document root:

sudo nano /var/www/html/info.php

This is valid PHP code that will return information about your server:
<?php
phpinfo();
Open URL : http://your_server_domain_or_IP/info.php

Setup Userdir On Nginx

The commands below opens Nginx default site configuration file.

sudo nano /etc/nginx/sites-available/default

Then add the highlighted block of code the settings below:

# Default server configuration

server {
        listen 80 default_server;
        listen [::]:80 default_server;

        # SSL configuration
        # listen 443 ssl default_server;
        # listen [::]:443 ssl default_server;

        root /var/www/html;

        # Add index.php to the list if you are using PHP
        index index.html index.htm index.nginx-debian.html;
        server_name example.com www.example.com;

         location ~ ^/~(.+?)(/.*)?$ {
         alias /home/$1/public_html$2;
         index index.html index.htm;
         autoindex on;
           }

}
Creating User Directories
mkdir ~/public_html

In the ~/public_html folder, create html documents to be shared and accessed via the webserver.

Restart Nginx webserver to load the settings.
sudo systemctl restart nginx.service

Now test to open browsing followed by username :

example: http://example.com/~jagdeep

Install, Setup Nginx on Debian / Ubuntu 18.04

 Install Nginx on Ubuntu 16.04 
Run Following commands on Terminal 
$sudo apt-get update
$sudo apt-get install nginx
Adjust the Firewall
We can list the applications configurations that ufw knows how to work with by typing:
$sudo ufw app list

You should get a listing of the application profiles:

Output
Available applications: 

 Nginx Full  
 Nginx HTTP  
 Nginx HTTPS  
 OpenSSH

You can enable this by typing:

$ sudo ufw allow 'Nginx HTTP'
$ sudo ufw status

Check your Web Server

$ systemctl status nginx

When you have your server's IP address or domain, enter it into your browser's address bar:
http://server_domain_or_IP

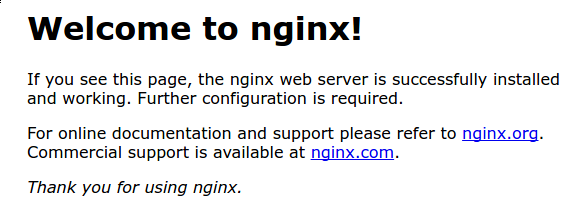
You should see the default Nginx landing page, which should look something like this:
Nginx default page
Manage the Nginx Process
$ sudo systemctl stop nginx
$ sudo systemctl start nginx
$ sudo systemctl restart nginx
$ sudo systemctl reload nginx
$ sudo systemctl disable nginx
$ sudo systemctl enable nginx

Saturday, January 20, 2018

Setup mail forwarding in postfix on Debian or Ubuntu

Install Postfix
$ sudo apt-get install postfix
After Install check postfix status
$ sudo service postfix status

Further check that postfix is running a server on port 25 with the netstat command
$ sudo netstat -ltnp | grep 25
Output : 
tcp        0      0 127.0.0.1:25      0.0.0.0:*    LISTEN      1926/master     
tcp6       0      0 ::1:25            :::*         LISTEN      1926/master
Verify DNS settings of domain
$ sudo dig example.com mx

Configure postfix to forward mails

Check the path of config folder using  postconf command
$ postconf | grep config_directory
config_directory = /etc/postfix

Edit the main.cf file and add following lines at end if  it

virtual_alias_domains = mydomain.com anotherdomain.com
virtual_alias_maps = hash:/etc/postfix/virtual

Now Create /etc/postfix/virtual file and add emails to forwad along with destination mails like:

myemail@domain.com   destination@gmail.com
othermail@domain.com otherdes@yahoo.com

First mail  address receive emails, and the second address would forward the emails.

For all forward emails use following lines

@mydomian.com  des@gmail.com 

After this save file and close it and run following commands

$ postmap /etc/postfix/virtual
$ sudo service postfix reload.

Now try to send an email from somewhere to the address on yourdomain and the same mail forwarded to other account.

Sunday, September 24, 2017

Laravel: Basic Artisan Console Commands

To view a list of all available Artisan commands, you may use the list command:
$ php artisan list


Displaying Your Current Laravel Version
$ php artisan --version 

To view a help screen, simply precede the name of the command with help:
$ php artisan help migrate

To enter the Tinker environment, run the tinker Artisan command. Tinker allows you to interact with your entire Laravel application on the command line, including the Eloquent ORM, jobs, events, and more.
$ php artisan tinker 

To migrate the database tables.
 $ php artisan migrate

To create model, migration, controller, Eloquent with single command.
 $ php artisan make:model name -mc

To create  controller with all functions like index, create, show, edit, destory and update.
 $ php artisan make:controller name -r

Friday, August 18, 2017

Install Laravel Framework on Ubuntu

Step 1 – Install LAMP

You will need to make sure your LAMP meets the following requirements:
  • PHP >= 5.6.4
  • OpenSSL PHP Extension
  • PDO PHP Extension
  • Mbstring PHP Extension
  • Tokenizer PHP Extension
  • XML PHP Extension
$ sudo apt-get install python-software-properties
$ sudo add-apt-repository ppa:ondrej/php
$ sudo apt-get update
$ sudo apt-get install -y php5.6 php5.6-mcrypt php5.6-gd
$ sudo apt-get install apache2 libapache2-mod-php5
$ sudo apt-get install mysql-server php5.6-mysql

Step 2 – Install Composer

Install Composer which is a tool for dependency management in PHP.

$ curl -sS https://getcomposer.org/installer | php
$ sudo mv composer.phar /usr/local/bin/composer
$ sudo chmod +x /usr/local/bin/composer

Step 3 – Install Laravel

Now create a directory where Laravel will be downloaded.
$ mkdir /var/www/html/your_website

Now enter the newly created directory and download the latest Laravel version.
$ cd /var/www/html/your_website
$ git clone https://github.com/laravel/laravel.git

Start the Laravel installation using Composer:
$ composer install

Dependencies installation will take some time. After than set proper permissions on files.
$ chown -R www-data.www-data /var/www/laravel
$ chmod -R 777 /var/www/laravel/storage

Step 4 – Set Encryption Key

# php artisan key:generate
You will notice the below error when running the command.

[ErrorException]
  file_get_contents(/var/www/html/your_website/.env): failed to open stream: No such file or directory

To solve this you should rename the .env.example file into .env:
$ mv .env.example  .env

Generate the encryption key again:
# php artisan key:generate

You should get the following output:
Application key [base64:ULQsledeS17HxCAsssA/06qN+aQGbXBPPpXVeZvdRWE=] set successfully.

Now edit the app.php file and configure the encryption key. Open the file with your favorite text editor. 

# vim config/app.php

Locate the ‘key’ => env(‘APP_KEY’ line and add the key next to it. After you are done the directive should look like this:


'key' => env('APP_KEY', 'base64:7fGASOGOSASA%^AYUFSA9TxZu8M2NwBWVEQsjPGRiasbdasYITIUG$%^$CSSA='),

    'cipher' => 'AES-256-CBC',

Save and close the file.

Now open your favorite web browser and navigate to  http://localhost/your_website  where you will be welcomed by a page as shown in the image below:
Laravel First Page

Sunday, July 2, 2017

Laravel as a beginner

Love beautiful code? The PHP Framework For Web Artisans

For beginner : Laravel 5.4 From Scratch Click Here
Each year, the Laracasts "Laravel From Scratch" series is refreshed to reflect the latest iteration of the framework. This is the 2017 edition, which uses version 5.4 of the framework.
Are you hoping to level up your toolset? You've come to the right place. This series will take you from installing Laravel, all the way up to mastering the essentials of the framework.

Monday, June 19, 2017

Best method get disk usage from command line

First Method 
$ df -lh
Filesystem      Size      Used  Avail Use% Mounted on
/dev/sda2       518G    39G   453G   8%      /
udev              16G      4.0K   16G   1%      /dev
tmpfs             3.2G    236K  3.2G   1%      /run
none              5.0M     0        5.0M  0%     /run/lock
none              16G      0        16G    0%     /run/shm
/dev/sda1        93M   4.3M   89M   5%     /boot/efi

Second method: For detail disk usage 
Works well from the command line. It's ncurses-based and interactive.
$ncdu /

Wednesday, June 14, 2017

How can I downgrade / Upgrade from PHP 7.0 to PHP 5.6 / PHP 5.6 to PHP 7.0 / PHP 8 on Ubuntu

Ubuntu 16.04 comes with php7.0, and some php web applications might fail to run  with php7.0. So, you test your web app with both php7.0 and php5.0  version. 

You can do following changes with Ubuntu sudo update-alternatives --config php
 
sudo apt install software-properties-common sudo add-apt-repository ppa:ondrej/php sudo apt update

root@pc1# apt-get install php7.0 php5.6 php5.6-mysql php-gettext php5.6-mbstring php-xdebug libapache2-mod-php5.6 libapache2-mod-php7.0 php5.6-curl php5.6-gd php5.6-mcrypt php5.6-xml php5.6-xmlrpc

sudo apt-get install php8.1 php8.1-fpm
sudo apt-get install php8.1-mysql php8.1-mbstring php8.1-xml php8.1-gd php8.1-curl
sudo apt-get install php7.4 php7.4-fpm
sudo apt-get install php7.4-mysql php7.4-mbstring php7.4-xml php7.4-gd php7.4-curl


Installing both php5.6 & php7.0 & php8.0 was clean in my case: no complain of issues, etc.

To switch from php7.0 to php5.6 or other:

# For php in web apps
sudo a2dismod php7.0 && sudo a2enmod php5.6 && sudo service apache2 restart
OR sudo update-alternatives --config php
# For php-cli in the command line
sudo ln -sfn /usr/bin/php5.6 /etc/alternatives/php
or from  php5.6 to php7:
# For php in web apps
sudo a2dismod php5.6 && sudo a2enmod php7.0 && sudo service apache2 restart
# For php-cli in the command line
sudo ln -sfn /usr/bin/php7.0 /etc/alternatives/php
Now Check php version : root@pc1# php --version or php -v
Remove : sudo apt-get remove php5.6-* 

Sunday, June 11, 2017

Problems faced during migration php/mysql code Windows to Linux

1.  Slashes in file names when migrating PHP project to Windows server from Linux server.
Solution : Need to remove back slash & forward slash with underscore (" _ ")

2. Case Sensitive : Mostly in windows both "A" and "a" treat same. But in Linux thinks are different. So need to take care of this. This problems faces both in PHP and MySql files and table respectively. 

You can configuring MySQL Tables to be Case Insensitive by editing the MySQL configuration file, which is generally found at /etc/mysql/my.cnf/etc/my.cnf or ~/my.cnf

Add the following line to the my.cnf configuration file:
lower_case_table_names=1
Then restart MySQL (or reboot):
/etc/init.d/mysql restart (Debian/Ubuntu/SuSE)
/etc/init.d/mysqld restart (Red Hat/CentOS/Fedora)

Today me facing problem the CodeIgniter Web Framework  code. In case of windows folder name was in cap mean in Upper case and in php coding same folder in lower case. It working fine with window server (XAMPP). But when I migrate same into Linux server (ubuntu LAMP) case sensitivity matters and creating problem to load files. You need to take care this otherwise php code does not work. 

Wednesday, June 7, 2017

Apache SSL Certificate Installation on Linux (Ubuntu) OS

For SSL Certificate Installation in Apache (Ubuntu OS)  follow the instructions below :

1. First Copy the Certificate files to your server on apache directory : In case of Ubuntu or Linux OS find path /etc/apache2/

2. Find the Apache config file to edit  Apache's main configuration file is typically named httpd.conf or /etc/apache2/conf.d/ or /etc/apache/sites-available/. 

3. Create  a files under apache configuration directory mention above like website-ssl.conf  for SSL.
If you need your site to be accessible through both secure (https) and non-secure (http) connections, you will need a virtual host for each type of connection. Make a copy of the existing non-secure virtual host.

4. Configure it for SSL as described below :

 <VirtualHost *:443>
DocumentRoot /var/www/html/
ServerName www.yourdomainname.com
SSLEngine on
SSLCertificateFile /path/to/your_domain_name.crt
SSLCertificateKeyFile /path/to/your_private.key
SSLCertificateChainFile /path/to/DigiCertCA.crt

</VirtualHost>

rename the file names to match your certificate files as mention above.

5. Test your Apache config before restarting your apache serviceRun the following command in case of ubuntu OS.

sudo service apache2 restart

Troubleshooting: If your web site is publicly accessible tool  like (SSL Tool 1 , SSL Tool 2SSL (Grading)) can help you find problems.