Thursday, December 6, 2018

Installing PHP and Configuring Nginx to Use the PHP Processor

Nginx does not contain native PHP processing like some other web servers, install php-fpm, which mean for "fastCGI process manager". Nginx to pass PHP requests to this software for processing.

Install the php-fpm module along with an additional helper package for mysql database server php-mysql, which will allow PHP to communicate with your database backend. Do this by typing:
sudo apt install php-fpm, php-mysql

Add the following content, which was taken and slightly modified from the default server block configuration file, to your new server block configuration file: /etc/nginx/sites-available/default


server {
        listen 80;
        root /var/www/html;
        index index.php index.html index.htm index.nginx-debian.html;
        server_name test.com;

        location / {
                try_files $uri $uri/ =404;
        }

        location ~ \.php$ {
                include snippets/fastcgi-php.conf;
                fastcgi_pass unix:/var/run/php/php7.2-fpm.sock;
        }

        location ~ /\.ht {
                deny all;
        }
}
Test your new configuration file for syntax errors by typing:
sudo nginx -t

Reload Nginx to make the necessary changes:
sudo systemctl reload nginx


Creating a PHP File to Test Configuration
To do this, use your text editor to create a test PHP file called info.php in your document root:

sudo nano /var/www/html/info.php

This is valid PHP code that will return information about your server:
<?php
phpinfo();
Open URL : http://your_server_domain_or_IP/info.php

Setup Userdir On Nginx

The commands below opens Nginx default site configuration file.

sudo nano /etc/nginx/sites-available/default

Then add the highlighted block of code the settings below:

# Default server configuration

server {
        listen 80 default_server;
        listen [::]:80 default_server;

        # SSL configuration
        # listen 443 ssl default_server;
        # listen [::]:443 ssl default_server;

        root /var/www/html;

        # Add index.php to the list if you are using PHP
        index index.html index.htm index.nginx-debian.html;
        server_name example.com www.example.com;

         location ~ ^/~(.+?)(/.*)?$ {
         alias /home/$1/public_html$2;
         index index.html index.htm;
         autoindex on;
           }

}
Creating User Directories
mkdir ~/public_html

In the ~/public_html folder, create html documents to be shared and accessed via the webserver.

Restart Nginx webserver to load the settings.
sudo systemctl restart nginx.service

Now test to open browsing followed by username :

example: http://example.com/~jagdeep

Install, Setup Nginx on Debian / Ubuntu 18.04

 Install Nginx on Ubuntu 16.04 
Run Following commands on Terminal 
$sudo apt-get update
$sudo apt-get install nginx
Adjust the Firewall
We can list the applications configurations that ufw knows how to work with by typing:
$sudo ufw app list

You should get a listing of the application profiles:

Output
Available applications: 

 Nginx Full  
 Nginx HTTP  
 Nginx HTTPS  
 OpenSSH

You can enable this by typing:

$ sudo ufw allow 'Nginx HTTP'
$ sudo ufw status

Check your Web Server

$ systemctl status nginx

When you have your server's IP address or domain, enter it into your browser's address bar:
http://server_domain_or_IP

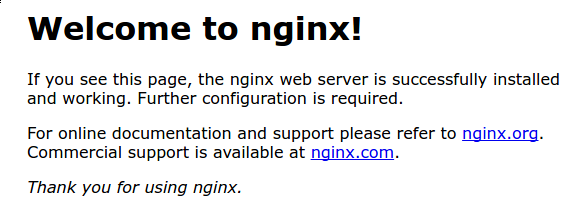
You should see the default Nginx landing page, which should look something like this:
Nginx default page
Manage the Nginx Process
$ sudo systemctl stop nginx
$ sudo systemctl start nginx
$ sudo systemctl restart nginx
$ sudo systemctl reload nginx
$ sudo systemctl disable nginx
$ sudo systemctl enable nginx